#Raspberry Pi UFW configurations
Explore tagged Tumblr posts
Visit Tumblr Blog
Explore Tumblr blogs with no restrictions, modern design and the best experience.
Last Seen Tumblr Blogs


Fun Fact
Tumblr has 411 employees.
Text
Raspberry Pi Firewall Command Line Configuration Step-by-Step
Raspberry Pi Firewall Command Line Configuration Step-by-Step #homelab #selfhosted #rapsberrypi #RaspberryPifirewallguide #UFWsetuponRaspberryPi #SecureRaspberryPinetworking #RaspberryPiUFWconfigurations #TroubleshootingUFWissues #RaspberryPifirewall
Raspberry Pi OS is an extremely popular self-hosting platform many use for running services. Let’s set the tone for Raspberry Pi firewall configuration via the command line and see what we will learn. Raspberry pi os What: A step-by-step how-to guide for UFW (Uncomplicated Firewall) on your Raspberry Pi Where: You can use this on native Raspberry Pi devices or other platforms like virtual…

View On WordPress
#Easy firewall setup on Raspberry Pi OS#Essential UFW commands#Protecting Raspberry Pi with UFW#Raspberry Pi firewall best practices#Raspberry Pi firewall guide#Raspberry Pi network security tips#Raspberry Pi UFW configurations#Secure Raspberry Pi networking#Troubleshooting UFW issues#UFW setup on Raspberry Pi
0 notes
Link
#configuration#encryption#firewall#IPmasking#Linux#networking#OpenVPN#Performance#PiVPN#Privacy#RaspberryPi#remoteaccess#Security#self-hosted#Server#Setup#simplest#systemadministration#tunneling#VPN#WireGuard
0 notes
Text
Raspberry PiにハードウェアWatchdogを設定してみましょう
Raspberry PiとRaspbian OSには、Watchdog Timer(ウォッチドッグタイマー、以下Watchdogと記します)と呼ばれる機構が入っています。これは、システムが動作していないと判断された時に、自動的にRaspberry PiがOS再起動をを行うというものです。
Raspbian Jessieより前のバージョンでは、Watchdogを設定するためにすでに確立したやり方があったようです。しかし、Raspbian Jessieになってからは、モジュールの名前が変わったりしたほか、Watchdogを有効にさせる方法も変わったりしていて、これというやり方がすぐには見つからないようです。Raspberry Piのフォーラムでもいくつか投稿があるようですが、その中で他の方法に比べてとてもシンプルな方法が投稿されていました。この投稿の内容をを実際に試したところ、うまく動作しましたのでこちらで紹介します。この方法の良いところは、追加でソフトウェアを入れる必要がないところです。設定ファイルの変更や作成だけでハードウェアWatchdogを実現できてしまいます!
本記事の前半は、CANDY Pi Lite(下の写真の基板です)に関係なくRaspberry Pi共通の話題としてWatchdogの設定方法を紹介します。また、後半はCANDY Pi Liteを利用される方向けに、Raspberry Piで簡単にハードウェアWatchdogをセットアップする方法を紹介します。

Watchdog設定方法
【対象となるOS】
これから紹介するWatchdogを有効化する方法は、Raspbian JessieとStretchのみ対応しています。それよりも古いOSでは動作しません。 なお、こちらの検証ではRaspbian Stretchを使いました。
【検証したハードウェア】
こちらの検証では、Raspberry Pi 3 Model Bを使っています。他の機種は試していませんが、Raspberry Piはどれも同じチップ(BCM2835/BCM2836)を使っていますから、Raspberry Pi Zeroなどでも動作するでしょう。
【具体的なやり方】
まず最初に、/boot/config.txtにWatchdogを有効にする設定を追加します。 エディターでファイルを開いて、以下の行を追加してください。
dtparam=watchdog=on
続いてWatchdogを動かすカーネルモジュールの設定を行います。 /etc/modprobe.d/bcm2835-wdt.confというパスにファイルを作成しましょう。 初めて設定するときはこのファイルは存在していませんので、新たに作成する必要があります。 このファイルは、特権ユーザーで作成しなければなりません(例えばsudo gedit /etc/modprobe.d/bcm2835-wdt.confのようにsudoが必要です)。
ファイルを作成したら、以下の1行を入力します。
options bcm2835_wdt heartbeat=14 nowayout=0
これは、14秒のハートビートをWatchdogが期待するという設定になります。14秒以内にハートビートが来ないときは、システムが異常であると判断するというものです。
最後に、systemdの設定を変更します。systemdは、そのハートビートを行う機能を持っています。ただ初期設定では���効になっていますのでこれを有効にします。
設定変更するファイルは/etc/systemd/system.confとなります。これもsudoを使うなど特権ユーザーで編集します。
エディターでファイルを開いたら、下記のようなコメントアウトされている設定を探しましょう。
#RuntimeWatchdogSec=0
これを以下のように変更します。
RuntimeWatchdogSec=14
これにより、systemdが14秒以内の間隔でハートビートを行うようになります。
変更して保存したら、準備は完了です。
【実際に動かしてみましょう】
設定を全て行ったら、Raspberry Piを再起動させましょう。再起動コマンドの代わりに電源OFF、電源ONでも大丈夫です。
再起動を行ったらまずはWatchdogが有効になっているかみてみましょう。ターミナルを開いて次のコマンドを実行してください。
dmesg | grep bcm2835-wdt
これを実行して以下のように表示されていればOKです。左側のカッコ内の数字は必ずしも同じとは限りませんので数字違いについては気にしないでください。 ただ、もし何も出て来ないときは、うまく設定できていないので、もう一度上記のやり方を見直してみましょう。
[ 0.722030] bcm2835-wdt 3f100000.watchdog: Broadcom BCM2835 watchdog timer
それでは、実際にWatchdogによる再起動を発動させてみましょう。 ターミナルに以下のコマンドを入力して実行してみてください。
⚠️きけん・ちゅうい⚠️ Watchdogを設定せずに行うと、電源を落とす以外に元に戻す方法はなくなります‼️
:(){ :|:& };:
この顔文字のようなコマンドは、フォークボム(フォーク爆弾)と呼ばれるもので、システムの内部で新しいプロセスをどんどん増殖させる極めて危険なコマンドです。 通常はこのようなコマンドを使うことはありませんが、今回はシステム上の問題を引き起こすために使用します。
さて、これを入力すると徐々にシステムの動作が遅くなっていきます。最終的にコマンド入力に反応しなくなり、約2分程度経過すると再起動されます(再起動までの時間は、システムの負荷の状況によるので、負担の大きいシステム稼働状況ではもっと早く再起動する��もしれません)。
なぜ14秒と指定したのに2分も再起動までかかるのでしょうか? それは、このフォークボムが行われている間も、システム自体はなんとか動き続けているためです。フォークボムによって、いよいよリソースがなくなって14秒以内にハートビートができなくなるという瞬間になるまで、約2分の時間がかかっているのです。
【Watchdogを無効にするには?】
もし、なんらかの理由でWatchdogを再び無効にしたいときはどうすれば良いでしょうか。
この場合は、単純に/boot/config.txtにおいてonとした箇所をoffにするだけで良いです。/bootの下にあるファイルなので直接SDカードリー��ーからPCなどでファイルを変更することもできますね。
dtparam=watchdog=off
設定を変更した後は再起動してください。
【前半まとめ】
以上が、Raspberry Piを利用したハードウェアWatchdogの設定有効化、無効化のやり方です。 以前のRaspbianのバージョンでは、Watchdogを使うために別のソフトウェアをインストールしなければならなかったのですが、このように設定を変更したり作成したりするだけで簡単にハードウェアWatchdog機能を使うことができるようになっています。
RaspberryPiを長期間、ずっと動かし続けるような運用を考えている方にとってはとても強力な機能になるでしょう。
続いて後半編です。
CANDY Pi Liteのセットアップ時にWatchdogを設定してみましょう
ここからは、CANDY Pi Liteをお使いの場合にWatchdogを簡単に設定できるようにする方法を紹介します。
CANDY Pi Liteをお使いの場合、専用のソフトウェアcandy-pi-liteサービスを利用します。バージョン1.6.0から、このソフトウェアをインストールする時に、Watchdogの設定も同時に行えるようになりました。
今回はこのバージョン1.6.0のソフトウェアをインストールして、同時にWatchdogの設定も行ってみましょう。
【インストールしてみましょう】
CANDY Pi LiteをRaspberry Piに取り付けて電源をいれてみてください。起動したら、ログインしてターミナルを開くか、SSHでログインしましょう。
もしすでに以前のバージョンのcandy-pi-liteサービスをいれている場合は、最初にアンインストールします。 初めてインストールする方は、この手順は不要です。
candy-pi-liteのアンインストール
sudo /opt/candy-line/candy-pi-lite/uninstall.sh
アンインストールしたら一旦再起動しましょう。
sudo reboot
candy-pi-liteのインストール
それでは、最新のcandy-pi-liteサービスを入れてみましょう。
curl -sL https://git.io/v7bXx | sudo ENABLE_WATCHDOG=1 bash
これを実行すると、、、
Collecting candy-board-cli Installing collected packages: candy-board-cli Successfully installed candy-board-cli-2.0.0 Collecting candy-board-qws (途中省略) [INFO] Configuring ufw... Firewall stopped and disabled on system startup Skipping adding existing rule Skipping adding existing rule (v6) Skipping adding existing rule Skipping adding existing rule (v6) Skipping adding existing rule Skipping adding existing rule (v6) Firewall is active and enabled on system startup [INFO] Configuring SC16IS7xx... [INFO] SC16IS7xx configuration done [INFO] Configuring Hardware Watchdog... [INFO] Hardware Watchdog configuration done [ALERT] *** Please reboot the system (enter 'sudo reboot') ***
こんな風に出てきます。最後に再起動を促されますから、再起動を行いましょう。
sudo reboot
Watchdog機能が有効かどうかをチェック!
先ほど記したように、以下のコマンドで有効になっているかどうかを調べることができます。 再起動してターミナルへ入ることができたら、以下のコマンドを実行してみましょう。
dmesg | grep bcm2835-wdt
以下のようなメッセージは見つけられますか?
[ 0.722030] bcm2835-wdt 3f100000.watchdog: Broadcom BCM2835 watchdog timer
見つかれば成功です!
これで、3GやLTEを付けっ放しにしても、不測の事態がRaspberryPiで起きて止まったままになることを避けられるようになります。 SDカードのデータがおかしくなってしま��たり、電源が落ちてしまったらどうしようもないんですけど、とは言ってもこれでRaspberryPiがだいぶ頼りになる存在になりますよ!
3 notes
·
View notes
Text
Raspberry Pi Kiosk with Security and Backup

Needs on for the Computer and Raspberry Pi
-Belena Etcher - https://www.balena.io/etcher/
-Raspbian Buster Lite - https://downloads.raspberrypi.org/raspbian_lite_latest
-Micro SD Card reader/writer
-Wired keyboard
Installing OS on Micro SD card
After downloading Raspbian Lite and Belena Etcher on your Windows machine, Select the Raspbian Lite img file. If it is still in the original zip file, please make sure you unzip or extract all the files so that Etcher can access the image file.
Select the Micro SD card, and Flash the Micro SD card.
Once the flash is complete, then you will plug in the Micro SD card to the Raspberry Pi and let it boot. You should see the following screen.
You should see the default Raspberry Login:
Username: pi
Password: raspberry
Configuring the Raspberry Pi
Change the default username and password for the raspberry pi:
Type: Sudo raspi-config
Select option 2 and follow the instructions to change the password to something else for security.
Select the language/region option specifically for the keyboard. You will have to change to keyboard to be an English - US keyboard NOT English – GB (Great Britain) keyboard. If you do not set this up correctly, you will not be able to type commands properly.
We will also need updates
sudo apt-get update
sudo apt-get upgrade (This may take a while)
sudo apt-get install unattended-upgrade
Reboot the device by typing:
sudo reboot
Login to pi
Now we will plug our raspberry pi into the network and configure our localized options with:
sudo raspi-config
Go to the main screen and go to option 3 and select option 1 and select B2.
Now we will install the kiosk software:
sudo apt-get install –no-install-recommends xserver-xorg x11-xserver-utils xinit openbox
This will take 5 minutes. After it installs, then we will be using chromium browser in incognito mode to configure the webpage.

Set this for Kiosk mode:
Sudo apt-get install –no-install-recommends chromium-browser
Type y
This will take 10 minutes to install.
Now we will setup autostart.
sudo nano /etc/xdg/openbox/autostart
You will see the following:
Note: If you do not see the screen above, you may have to troubleshoot. Troubleshooting steps: run the following:
sudo apt-get clean
sudo apt-get autoremove
sudo apt-get remove --auto-remove --purge 'libx11-.*'
sudo apt-get autoremove --purge
Now, go back and re-install the kiosk software and the chromium browser.
Once, get the screen above, leave everything as is. Move to the bottom of the screen where there is no text. Type:
xset s off
xset s noblank
xset –dpms
chromium-browser --disable-infobars --kiosk --incognito ‘http://www.DavidAlanGarza.com’
Once you have that set, type Cntl-X type y Click Enter
Now to disable the mouse cursor:
Type: startx -- -nocursor -incognito
This will display the webpage or should. If it did not, you will need to see what needs correcting on the code above.
Now we will go back into
Nano .bash_profile
Now type the following very very carefully:
[[ -z $DSIPLAY && $XDG_VTNR –eq 1 ]] && startx -- -nocursor
Type CNTL-X to save and type y

Improve Security:
We will deny sshd by typing
sudo nano /etc/ssh/sshd_config
allowUsers pi
Now we will install a firewall by typing the following:
sudo apt install ufw
sudo ufw enable
Now we will install an fail2ban which scans log files (e.g. /var/log/apache/error_log) and bans IPs that show the malicious signs -- too many password failures, seeking for exploits, etc. Generally Fail2Ban is then used to update firewall rules to reject the IP addresses for a specified amount of time, although any arbitrary other action (e.g. sending an email) could also be configured. Out of the box Fail2Ban comes with filters for various services (apache, courier, ssh, etc). Fail2Ban is able to reduce the rate of incorrect authentications attempts however it cannot eliminate the risk that weak authentication presents. Configure services to use only two factor or public/private authentication mechanisms if you really want to protect services.
Type: sudo apt install fail2ban
Installing Automatic Updates:
By default your Pi won’t be rebooted if required, so if you want it to (and want to set the time) you can do that like this:
First install Unattended-upgrade
sudo apt-get install unattended-upgrade
sudo sed -i 's/^\/\/Unattended-Upgrade::Automatic-Reboot "false";/Unattended-Upgrade::Automatic-Reboot "true";/g' /etc/apt/apt.conf.d/50unattended-upgrades
sudo sed -i 's/^\/\/Unattended-Upgrade::Automatic-Reboot-Time "02:00";/Unattended-Upgrade::Automatic-Reboot-Time "02:00";/g' /etc/apt/apt.conf.d/50unattended-upgrades
And if you want unused packages to be removed (like when you run apt-get autoremove):
sudo sed -i 's/^\/\/Unattended-Upgrade::Remove-Unused-Dependencies "false";/Unattended-Upgrade::Remove-Unused-Dependencies "true";/g' /etc/apt/apt.conf.d/50unattended-upgrades
Next we must create the /etc/apt/apt.conf.d/20auto-upgrades file to instruct the updater what to do:
sudo tee /etc/apt/apt.conf.d/20auto-upgrades > /dev/null <<EOF
APT::Periodic::Update-Package-Lists "1";
APT::Periodic::Unattended-Upgrade "1";
EOF
And that’s all there is to it! Every day your Pi will now check for updates
Cloning Micro SD
Download Win32 Disk Imager onto your computer. https://sourceforge.net/projects/win32diskimager/
If you have a micro sd card you want to image, plug it into the computer.
You will see the following window:
In the image file type in where you want to save an img file. You can create an empty text file and rename it to be a .img file and write over it if you want to create an image.
Select Write to write over the image file. Select Read to erase and image the Micro SD card with whatever is on the .img file.
Last Note:
If you are noticing that something is not working right while you are building this kiosk. You may want to completely restart from scratch and re-install the OS. On of the main things about this Raspbian and these Raspberry Pi’s is that if one thing gets slightly corrupt, then the whole system can be corrupted. So with this project, be patient, and take your time. The majority of the code is Case Sensitive. It can be tedious, but I know you can do it! I hope you have fun setting up the kiosk.
Hidden Wifi:
I found out these would not connect to the hidden Wireless. It would even attempt to access.
You must open text editor to:
sudo nano /etc/wpa_supplicant/wpa_supplicant.conf
and change the following:
ctrl_interface=DIR=/var/run/wpa_supplicant GROUP=netdev update_config=1 country=US
network={ ssid="Your Hidden SSID" scan_ssid=1 key_mgmt=WPA-PSK psk="Your SSID's Password"
}
0 notes
Text
Midterm Documentation
Introduction
This write up is for my midterm project. The goal of this project was to create interactive art using an "air piano" and computers.
"Air piano" is similar to an "air guitar", in the sense that users will be playing keys in the air to create sound. This is established by using a Pi and a laser range finder (LRF). The LRF can determine the distance from the source to the object, which act as the range for determining which key is pressed. For example, if the set maximum range is 1000, and there are 10 keys, a measured distance of 50 will result in the first key being "pressed". This is because the bins range from 0 to 1000, in intervals of 100. Each bin corresponds to a key. The distance will fall in one of the bins, which can then activate the key.
The second part is audience interactivity. Since only one person can use the LRF, it is difficult for the whole audience to participate. This can be fixed by allowing participants to use their personal computers to interact with the piece. A webserver is used to show the pressed keys, and allows others to use their keyboards and also create music. Their keystrokes are shared among all users, so everybody can create sound together.
The rest of the this writeup will discuss how I setup all of the components. Any mistakes that I have made will be explained at the end.
Components
Raspberry Pi
Electronics Starter Kit
Parallax Laser Range Finder
Private Webserver
Setting up the Webserver
The first step is purchasing private server. This is necessary because interactivity can be established by allowing all clients to interact with a central host, which is my webserver.
I personally bought the cheapest droplet because this project does not need a lot of computing power. I selected Ubuntu with NodeJS as the system image, so that less setup is required. Then, I selected the SF location server because it is the closest one to me, which will result in lower latency.
Next, I had to login to my private server.
There were a few of methods I used to login. I used ssh, the online console. Both methods are nearly identical, but I prefer using ssh. I also used PuTTY on my Windows machine to ssh in. On my Macbook, I used console/terminal to ssh.
I entered the following commands to setup the extreme basics of Nginx (webserver). Pm2 is an easy to use process manager, which will be useful for forking processes.
sudo apt update sudo apt install nginx sudo ufw allow 'Nginx HTTP' sudo npm install pm2 -g
After that, I organized my webserver because organization is always very important!
cd /var/www/html mkdir public
This will create a new folder called public, where I stored client sided files. That means that vistors will be shown the files inside public.
Now, I modified the configuration of Nginx so that it knows what to display.
nano /etc/nginx/sites-available/default
I changed the line containg root /var/www/html; to root /var/www/html/public;. This basically changes which directory is the root or public directory of the website. Anything in the public directory can be displayed or found by visitors.
Setting up the Server
As a side note, this whole section is a mistake that I will explain at the end of this write up. After navigating to /var/www/html, I created a new file called server.js and installed some necessary libraries.
cd /var/www/html npm install express npm install socket.io nano server.js
I'm using Express to create the server because it requires very little setup. The following code block will load in the necessary libraries and initialze Express.
const http = require('http'); const express = require('express'); var app = express();
The following block initializes the server on localhost port 8080. Any connections to that port will establish a connection between the client and server. It includes a callback function that includes callbacks whenever data is transmitted from the client to server and when the client disconnects. When it recieves a signal post, it broadcasts the casted data to everybody that is connected. The client will handle the incoming data.
var server = app.listen(8080); var io = require('socket.io')(server); io.sockets.on('connection', function (socket) { console.log("We have a new client: " + socket.id); socket.on('post', function(data) { io.sockets.emit('post', parseInt(data)); } ); socket.on('disconnect', function() { console.log("Client has disconnected"); }); } );
This next block basically creates another server on port 3000 that handle POST requests.
var restServer = http.createServer((req, res) => { if (req.method === 'POST') { var body = ''; req.on('data', function (data) { body += data; }); req.on('end', function () { io.sockets.emit('post', parseInt(body)); }); res.writeHead(200, {'Content-Type': 'text/html'}); res.end('POST received'); } else { response.end('Not POST'); } }); restServer.listen(3000);
I saved the file and started it as a background process using pm2.
pm2 start server.js
This will start server.js as a process in the background, so it will be able to listen on ports 8080 and 3000.
Setting up the Client
I created a new folder in /var/www/html/public called assets to store my piano sounds. Next, I made a new file called sketch.js, which holds the client code.
const naturalKeyNames = ['A', 'B', 'C', 'D', 'E', 'F', 'G']; // Keep track of our socket1 connection var socket1; var keys = {1: keyA, 2: keyB, 3: keyC, 4: keyD, 5: keyE, 6: keyF, 7: keyG}; var sounds = []; //5x3 letters var currentRow = 0; var currentColumn = 0; var w; var columns; var rows; var board; var next; function preload() { for (let i = 0; i < naturalKeyNames.length; i++) { sounds.push(loadSound(String('assets/reg-' + naturalKeyNames[i] + '.mp3'))); } console.log(sounds) } function setup() { createCanvas(1872, 1024); frameRate(30); w = 20; // Calculate columns and rows columns = floor(width/w); rows = floor(height/w); // Wacky way to make a 2D array is JS board = new Array(columns); for (var i = 0; i < columns; i++) { board[i] = new Array(rows); } // Going to use multiple 2D arrays and swap them next = new Array(columns); for (i = 0; i < columns; i++) { next[i] = new Array(rows); } socket1 = io.connect('http://178.128.70.190:8080'); socket1.on('post', function(data) { console.log(currentColumn, currentRow); keys[data](currentColumn, currentRow, 255); currentColumn += 4; if (currentColumn + 3 > columns) { currentRow += 6; currentColumn = 0; } if (currentRow + 5 > rows) { currentRow = 0; currentColumn = 0; } sounds[data - 1].play(); } ); console.log(columns, rows); }
This block of code splits the canvas into blocks, depending on the set width and height and connects to the websocket. It also contains a function that handles socket packets. Whenever the server sends a packet with a key 'post', this function will run. It basically sets the row and column of where the next letter will be placed and also plays the corresponding sound.
The next block of code allows limited keyboard input.
function keyPressed() { if (key <= '7' && key !== '0') { socket1.emit('post', key); } }
Basically, whenever a key number key from 0 to 7 is pressed, it sends a packet to the server with the key number as its data. The server will transmit the data recieved from the client to all clients, so everybody else can see what is played.
This next part contains functions that draw the letters. Based on the current row and column, it sets the block the color white. The getValue function is not needed, but was there because of an idea that I wanted but decided it would not be in the final version. There are also functions between keyA and keyG, but most of the code is the same, and to save space, I'm not including it here.
function draw() { background(255); for ( var i = 0; i < columns;i++) { for ( var j = 0; j < rows;j++) { if (!isNaN(board[i][j])) { board[i][j] -= 1.5; fill(board[i][j]); } else { fill(0); } stroke(0); rect(i*w, j*w, w-1, w-1); } } } function getValue(mode) { if (mode === true) { return floor(random(2)); } return mode; } // TODO: Modularize this function keyA(x=0, y=0, value=false) { board[0 + x][0 + y] = getValue(value); board[0 + x][1 + y] = getValue(value); board[0 + x][2 + y] = getValue(value); board[0 + x][3 + y] = getValue(value); board[0 + x][4 + y] = getValue(value); board[2 + x][0 + y] = getValue(value); board[2 + x][1 + y] = getValue(value); board[2 + x][2 + y] = getValue(value); board[2 + x][3 + y] = getValue(value); board[2 + x][4 + y] = getValue(value); board[1 + x][0 + y] = getValue(value); board[1 + x][2 + y] = getValue(value); } ... function keyG(x=0, y=0, value=false) { board[0 + x][0 + y] = getValue(value); board[0 + x][1 + y] = getValue(value); board[0 + x][2 + y] = getValue(value); board[0 + x][3 + y] = getValue(value); board[0 + x][4 + y] = getValue(value); board[1 + x][0 + y] = getValue(value); board[1 + x][2 + y] = getValue(value); board[1 + x][4 + y] = getValue(value); board[2 + x][0 + y] = getValue(value); board[2 + x][2 + y] = getValue(value); board[2 + x][3 + y] = getValue(value); board[2 + x][4 + y] = getValue(value); }
After coding all of that, I ran sudo systemctl restart nginx to restart the webserver. Going to my website now loads the sketch.
The Raspberry Pi and LRF
This section will be completed in the following days.
Mistakes
So, the main mistake is that this whole project is not the correct way to setup a webserver. Due to a lack of sleep, I misunderstood some documentation, which confused my view on a webserver.
The fix for this mistake is to just use ExpressJS for the whole thing. The whole public file system and pm2 is not necessary because Express can serve static files. Instead of having pm2 host server.js in the background, and Nginx serving index.html, sketch.js, and assets/, Nginx can just serve one javascript file that contains code that uses Express to deliver sketch.js and handle websockets.
The code might something like this:
var express = require('express') , routes = require('./routes') , http = require('http'); var app = express(); var server = app.listen(3000); var io = require('socket.io').listen(server); // this tells socket.io to use our express server app.configure(function(){ app.set('views', __dirname + '/views'); app.set('view engine', 'jade'); app.use(express.favicon()); app.use(express.logger('dev')); app.use(express.static(__dirname + '/public')); app.use(express.bodyParser()); app.use(express.methodOverride()); app.use(app.router); }); app.configure('development', function(){ app.use(express.errorHandler()); }); app.get('/', routes.index);
This allows Express to handle everything. When going to the default webaddress, the public files will be served. It also starts a websocket, so clients can connect.
A short summary is that I basically complicated my delivery of files by using pm2 with Nginx, while the whole server can be hosted just using Nginx. In other words, I was using pm2 to host the server and Nginx to deliver the client. In reality, Nginx should have hosted the server and client using Express.
0 notes
Text
Security tips for your homemade IoT network
*Gosh, imagine the playful fun!
https://makezine.com/2018/07/26/top-tips-to-tighten-security-on-your-homebrew-iot-projects/
In that triumphant moment of getting your connected project up and running, it’s easy to forget how vulnerable IoT projects can be without taking basic security precautions. You might wonder why someone would bother taking control of you house lights, but unprotected entries to your network can provide a treasure trove of information for hackers. Protect yourself and your projects with these easy-to-implement tips.
Get this article and more in Make: Vol. 64. Subscribe now for great projects and articles all year long.
For Raspberry Pi/Linux Boards
1. Change the default user password
All Raspbian OS installs use the same password for the default pi user. Attackers will try common and default passwords to access a system before they move on to more sophisticated attacks. Stop them by using the passwd command to change yours to a new unique and strong value.
See the Raspberry Pi user documentation for details on the passwd command that changes a user’s password. Also check out advice on creating a strong password that will be very difficult for an attacker to guess or ‘brute-force’ attack.
2. Disable password login with SSH
Even a good password is still at risk for a determined attacker to guess its value and access the machine remotely with SSH. Prevent this by using security keys to login to your board instead. These keys grant access only from other allowed computers, and they use sophisticated cryptography that’s extremely difficult to guess or break. Even better, once you set up key-based login you don’t have to remember passwords!
See the Using Key-Based Authentication section of the Raspberry Pi security documentationfor more details on how to configure SSH for key-based login.
3. Keep the OS up to date
No software is perfect; inevitably, vulnerabilities or bugs will be found that could allow an attacker to access your board. Diligently use the apt-get upgrade command to keep your board’s operating system up to date with the latest security patches and fixes.
See the Raspberry Pi updating and upgrading documentation for details on how to get the latest software with the apt-get upgrade command.
4. Set up a firewall
Your IoT gadget likely doesn’t use all the services that the Pi operating system provides, such as web server, email server, and more. Use a firewall to close off access to unused services. This helps prevent an attacker from accessing your board through vulnerabilities and bugs in its services. The best approach is to turn off access to all services by default, and then only turn on services your project uses like web or other access.
See the Install a Firewall section of the Raspberry Pi security documentation for details on how to use the ufw tool to enable a firewall on your board.
5. Review Linux security best practices.
You can follow much of the same advice for securing a general Linux machine. There are great resources available like DigitalOcean’s “Introduction to Securing Your Linux VPS” and “7 Security Measures to Protect a Linux Server.” These guides explain tools like fail2ban and tripwire that go further to detect intrusions and deter attackers. The Linux security world is constantly evolving so it never hurts to periodically consult these guides for the latest tools and best practices.
For All Devices
1. Change default passwords
It bears repeating — it’s the number one vulnerability for internet-connected devices. This applies to your router, IP cameras, network printers, etc. If you can look up the password online, so can everyone else! You do not want hackers getting control of any device that’s on your internal network.
2. Keep firmware and software up to date
Stay protected from known security vulnerabilities. (((etc etc)))
0 notes
Text
RPi2 Headless Home Server - Part 4: Audio en el Equipo de Música
Fuente: https://github.com/hzeller/gmrender-resurrect/blob/master/INSTALL.md http://blog.scphillips.com/posts/2014/05/playing-music-on-a-raspberry-pi-using-upnp-and-dlna-v3/
y un millón y medio de sitios más... parece que hay algo más piola llamado Volumio para los seres “audiófilos con Raspberrys”.
Hay muchas cosas que tienen que funcionar para que el todo ande bien: la configuración de audio, del DLNA renderer y de la red. Va mucho más allá de mi conocimiento de todo a medias.
Para la red, hice lo peor y simplementa apagué el firewall: sudo ufw disable
Para el audio, tuve que sacar pulseaudio y quedarme con ALSA. Pulseaudio funcionaba cuando arrancaba Gmrenderer desde la línea de comandos, pero no con el script de init.d.
Preparación
Para Gmrenderer-ressurrect (acá está la magia) seguí la guía de hzeller en Github, y dice:
sudo apt-get update sudo apt-get install autoconf automake libtool pkg-config sudo apt-get install libupnp-dev libgstreamer1.0-dev gstreamer1.0-plugins-base gstreamer1.0-plugins-good gstreamer1.0-plugins-bad gstreamer1.0-plugins-ugly gstreamer1.0-libav
Acá puede ser ALSA o PulseAudio: sudo aptitude install gstreamer1.0-alsa sudo aptitude install pulseaudio gstreamer1.0-pulseaudio
Build GmrendererRessurect: sudo apt-get install git git clone https://github.com/hzeller/gmrender-resurrect.git cd gmrender-resurrect ./autogen.sh ./configure make sudo make install
Configuración
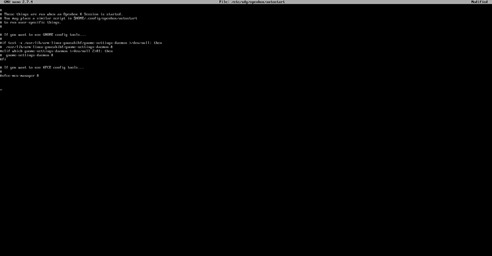
sudo cp scripts/init.d/gmediarenderer /etc/init.d sudo update-rc.d gmediarenderer defaults sudo nano /etc/init.d/gmediarenderer
ALSA
DAEMON_USER="pi:pi"
ALSA_DEVICE=“alsasink”
PULSEAUDIO
DAEMON_USER="pi:pi"
AUDIO_SINK=“pulsesink”
Tambien sirve agregar el logfile al comando de start:
--logfile="/home/pi/gmediarenderer.log"
El logfile tiene muchas cosas interesantes, incluyendo el puerto que usa. Quizás sea interesante para volver a levantar el firewall.
Estuve como dos horas intentando que funcionara con pulseaudio, y en el medio hice mil cosas, quizás alguna fue necesaria. En particular encontré que es necesario cambiar algo de los grupos, sumar usuarios al grupo audio.
sudo usermod -a -G audio root sudo usermod -a -G pulse-access root
A mi me quedó así:
groups pi pi : pi adm dialout cdrom sudo audio video plugdev games users input netdev spi i2c gpio
groups root root : root audio pulse-access
Desde acá se maneja el volumen en ALSA:
alsamixer sudo alsactl store #para guardar los cambios
Uso
Con bubbleupnp en Android se puede jugar lindo!
Mucho más si ya hiciste la config de tu disco rígido externo y agregas su path a la lista de medios de minidlna.
Toda tu biblioteca para reproducir en casa sin cables, profit!
0 notes